Deploy Frontend and Backend API server using nginx and pm2
Posted on Jun 23, 2021 ‐ 4 min read
Setting up a simple server for your single page application seems easy but one thing you miss and you spend hours debugging what went wrong. So, I've prepared a list of steps that you will need to quickly setup a frontend and backend API server.
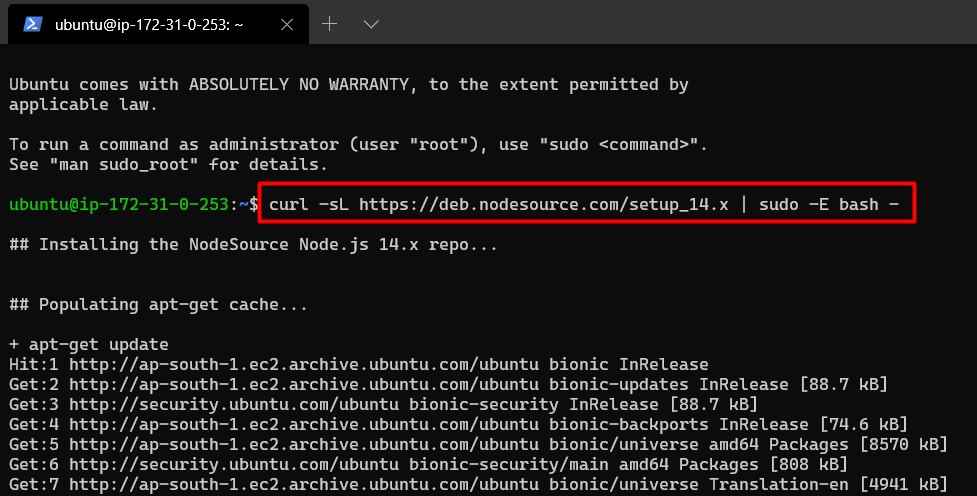
If it's a JavaScript application which I believe it is, for most of you, then you will need to install Node.js, as Linux distros don't come with node.js preinstalled. Let's quickly grab the latest and stable node release from the GitHub link below.
Grab the latest stable Node.js release and add it do your Linux repo by using the following command.
curl -sL https://deb.nodesource.com/setup_12.x | sudo -E bash -
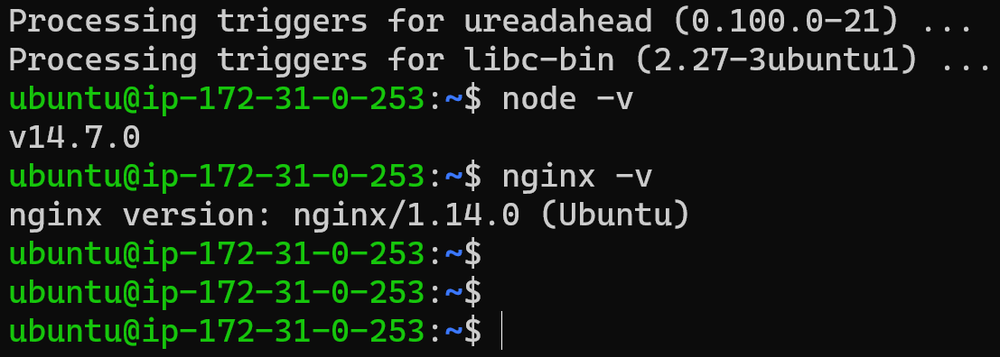
sudo apt-get install -y nodejs
Next step, Nginx, it is a simple, light and high-performance web server. You can use Apache server if you want, but to keep it fast and easy I'll use nginx as reverse proxy server.
Install the nginx server from the following command and check if it's installed correctly with nginx -v command.
sudo apt update
sudo apt install -y nginx
You will need to create two nginx conf files. One for frontend server and other for backend api server.
sudo touch /etc/nginx/sites-available/domain.com.conf
sudo touch /etc/nginx/sites-available/api.domain.com.conf
Set the apporpriate domain name and port number for frontend in .conf file
server {
   server_name domain.com www.domain.com;
   location / {
        proxy_pass http://localhost:4200;
        proxy_http_version 1.1;
        proxy_set_header Upgrade $http_upgrade;
        proxy_set_header Connection 'upgrade';
        proxy_set_header Host $host;
        proxy_cache_bypass $http_upgrade;
  }
}
Do the same with backend API .conf file
server {
  server_name api.domain.com;
    location / {
    proxy_pass http://localhost:4000;
    proxy_http_version 1.1;
    proxy_set_header Upgrade $http_upgrade;
    proxy_set_header Connection 'upgrade';
    proxy_set_header Host $host;
    proxy_cache_bypass $http_upgrade;
  }
}
Make links of conf files to site-enabled folder
sudo ln -s /etc/nginx/sites-available/api.domain.com.conf /etc/nginx/sites-enabled/api.domain.com.conf
sudo ln -s /etc/nginx/sites-available/domain.com.conf /etc/nginx/sites-enabled/domain.com.conf
sudo systemctl start nginx
If you want to add an SSL certificate then you can install it using certbot, SSL certificate is provided by Let's Encrypt for free and I highly recommend using it. List all the domain and by using -d flag and follow the on-screen steps.
sudo snap install certbot --classic
sudo certbot --nginx -d domain.com -d www.domain.com -d api.domain.com

#Only valid for 90 days, test the renewal process with
sudo certbot renew --dry-run
Once you are finished installing the SSL certificates. Let's install pm2 a production ready process manager to keep our server running all the time. We will use npm to install it globally so make sure you run as sudo. The just enter pm2 startup and run the displayed command to start pm2 during system reboot.
sudo npm i -g pm2
pm2 startup
sudo env PATH=$PATH:/usr/bin /usr/lib/node_modules/pm2/bin/pm2 startup systemd -u ubuntu –hp /home/ubuntu

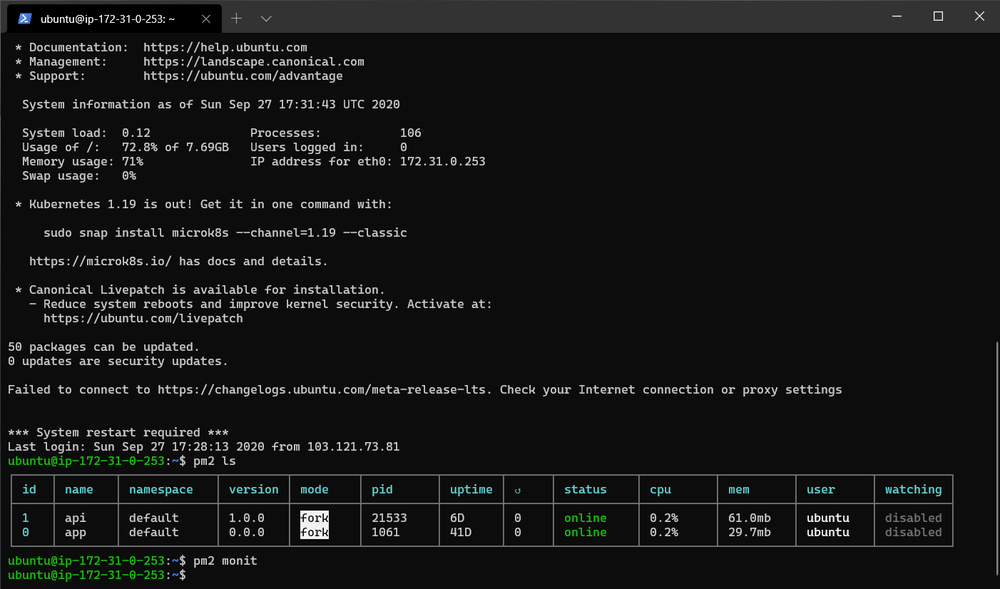
You can run the frontend app by browsing to its source folder and use npm scripts defined in package.json file. If your start script is npm start then just use the following command or just use pm2 start index.js. You can do the same for backend API.
pm2 start --name "api" npm -- start
pm2 start server.js –-name "app"
And voila! Now you have a both backend and frontend server running on nginx with SSL certificate.
If you face any difficulties then write to me on @vip_iny.